When using Longhorn, it’s a must to known how to manually install drivers in Windows. The process is basically the same in all versions of Windows, but I thought it couldn’t hurt if I would write up a short tutorial for those people new to installing drivers.
We start off by opening Run by pressing WIN + R . In the dialog, type devmgmt.msc

Click OK. The Device Manager will now open up. Next, expand the item that you want to install the driver off. Items which have currently no driver install will show up as a yellow question mark. In this case I will install a new driver for the display adapter, so I expanded this item.

Right-click the device and select Install Driver if none was installed or Update Driver if you wish to update an existing one.

Be sure to insert you driver disk right now! If you’re running under VMWare, you can download driver packages from this site.
You can now let the Hardware Wizard install the driver for you by selecting the first option. In case you want to further specify where your driver is located you can choose the second option.

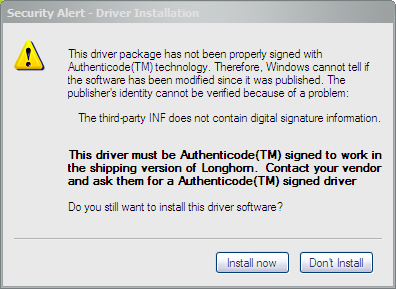
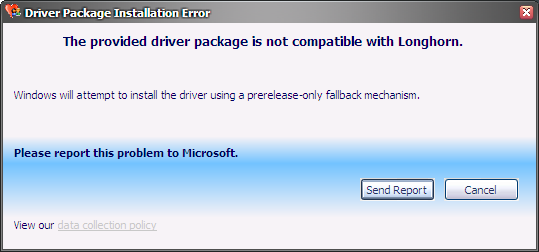
Upon click Next, the driver installation will commence. At this point, Windows might throw some error dialogs your way. You can just ignore these and continue the driver installation. A few examples of errors you may encounter are below.

By now, your driver should be installed! I hope this quick tutorial helped you out.